Creating a verify policy
A verify policy dictates what is required to verify a user, such as an ID verification, facial comparison, or liveness.
About this task
A verify policy allows you to create PingOne Verify transactions for different scenarios, such as:
-
Choosing documents for verification during employee onboarding
-
Selfie liveness and comparison during multi-factor authentication (MFA) in PingID using PingOne Verify
Steps
-
In the PingOne admin console, go to Identity Verification > Verify Policies.
A default verify policy based on your environment capabilities is listed.
-
Click the icon.
-
Enter the following information:
Table
Field Description Name
The policy’s name.
Description
The policy’s description.
Configuration
Transaction Timeout: Time period (in minutes) in which data can be collected after a transaction is created. The maximum transaction timeout is 30 minutes.
Data Collection Timeout: Time period (in minutes) in which data can be collected after initiating verification from the UI. By default, the data collection timeout is set to 15 minutes. The maximum data collection timeout is 30 minutes.
Data Collection Only: Data collection collects documents from a user but does not process them for verification.
Government ID
Verification based on government-issued documents. For example, a driver license or a passport.
Configure the following policy settings:
-
ID Verification: Select Required, Optional, or Disabled.
-
Document Authentication Provider: The provider used to authenticate government documents. Select Mitek (default) or Veriff.
-
Inspection Type: Select the type of inspection performed on government-issued documents:
-
Automatic: AI-based analytics examine the ID document to determine if it is original and unaltered.
-
Manual: A human agent trained in document authentication examines the photo of the ID to determine its authenticity.
-
Step-Up to Manual: Automated inspection is tried first. If the document cannot be verified, the service switches to manual inspection.
Manual and Step-Up to Manual inspection types require an additional license.
-
-
Government ID Retry Attempts: The number of times a user can retry scanning an ID if the first attempt fails. Possible values for government ID retry attempts are 0 - 3.
-
Enable AAMVA: Click the toggle to enable verification of ID information against the issuing agency database, the AAMVA Driver’s License Data Verification (DLDV) service.
-
Fail Expired IDs: Click the toggle to enable fail verification for expired IDs.
Facial Comparison
A live photo (selfie) compared with government ID documents or reference selfie for verification.
Configure the following policy settings:
-
Facial Comparison: Select Required, Optional, or Disabled.
-
Threshold: The probability that selfies are likely to match with document images (facial comparison) or pass liveness checks (liveness). Select Low, Medium, or High threshold.
Selfies are less likely to match or pass with a higher threshold.
Liveness
A liveness check on the live photo (selfie) for verification.
Configure the following policy settings:
-
Liveness: Select Required, Optional, or Disabled.
-
Threshold: The probability that selfies are likely to match with document images (facial comparison) or pass liveness checks (liveness). Select Low, Medium, or High threshold.
Selfies are less likely to match or pass with a higher threshold.
-
Selfie Retry Attempts: The number of times a user can retake a selfie if the first attempt fails. Possible values for selfie retry attempts are 0 - 3.
Voice Verification
Verification using voice samples of the end user. There are two types of voice verification policies: enrollment and verification.
You must configure a separate enrollment policy and verification policy.
Configure the following policy settings:
-
Voice Verification: Select Required, Optional, or Disabled.
-
Enrollment toggle: Click to enable an Enrollment policy. Disable for a Verification policy.
-
Text Dependent Samples: The number of voice samples the user must record for enrollment.
-
Voice Text Dependent Phrase: Phrase the user repeats for enrollment or verification.
You can configure custom phrases with the API. Learn more in Create Custom Voice Phrase in the PingOne developer documentation.
-
Comparison Threshold: Voice samples are less likely to match with the voice template at higher thresholds.
-
Liveness Threshold: Voice samples are less likely to pass liveness testing at higher thresholds.
-
Retain Original Recordings: Click the toggle to enable storing the original voice sample after a successful transaction.
-
Update On Reenrollment: If disabled, the voice reference is replaced instead of enhanced with additional data.
-
Update On Verification: Click the toggle to enable improving the existing voice reference by adding a new template.
Phone Verification
Phone verification using one-time passcode (OTP): Select Required, Optional, or Disabled.
Create MFA Device: Registration of a user’s phone number as a trusted MFA device after successful OTP or web link verification.
Email Verification
Email verification using OTP: Select Required, Optional, or Disabled
Create MFA Device: Registration of a user’s email address as a trusted MFA device after successful OTP or web link verification.
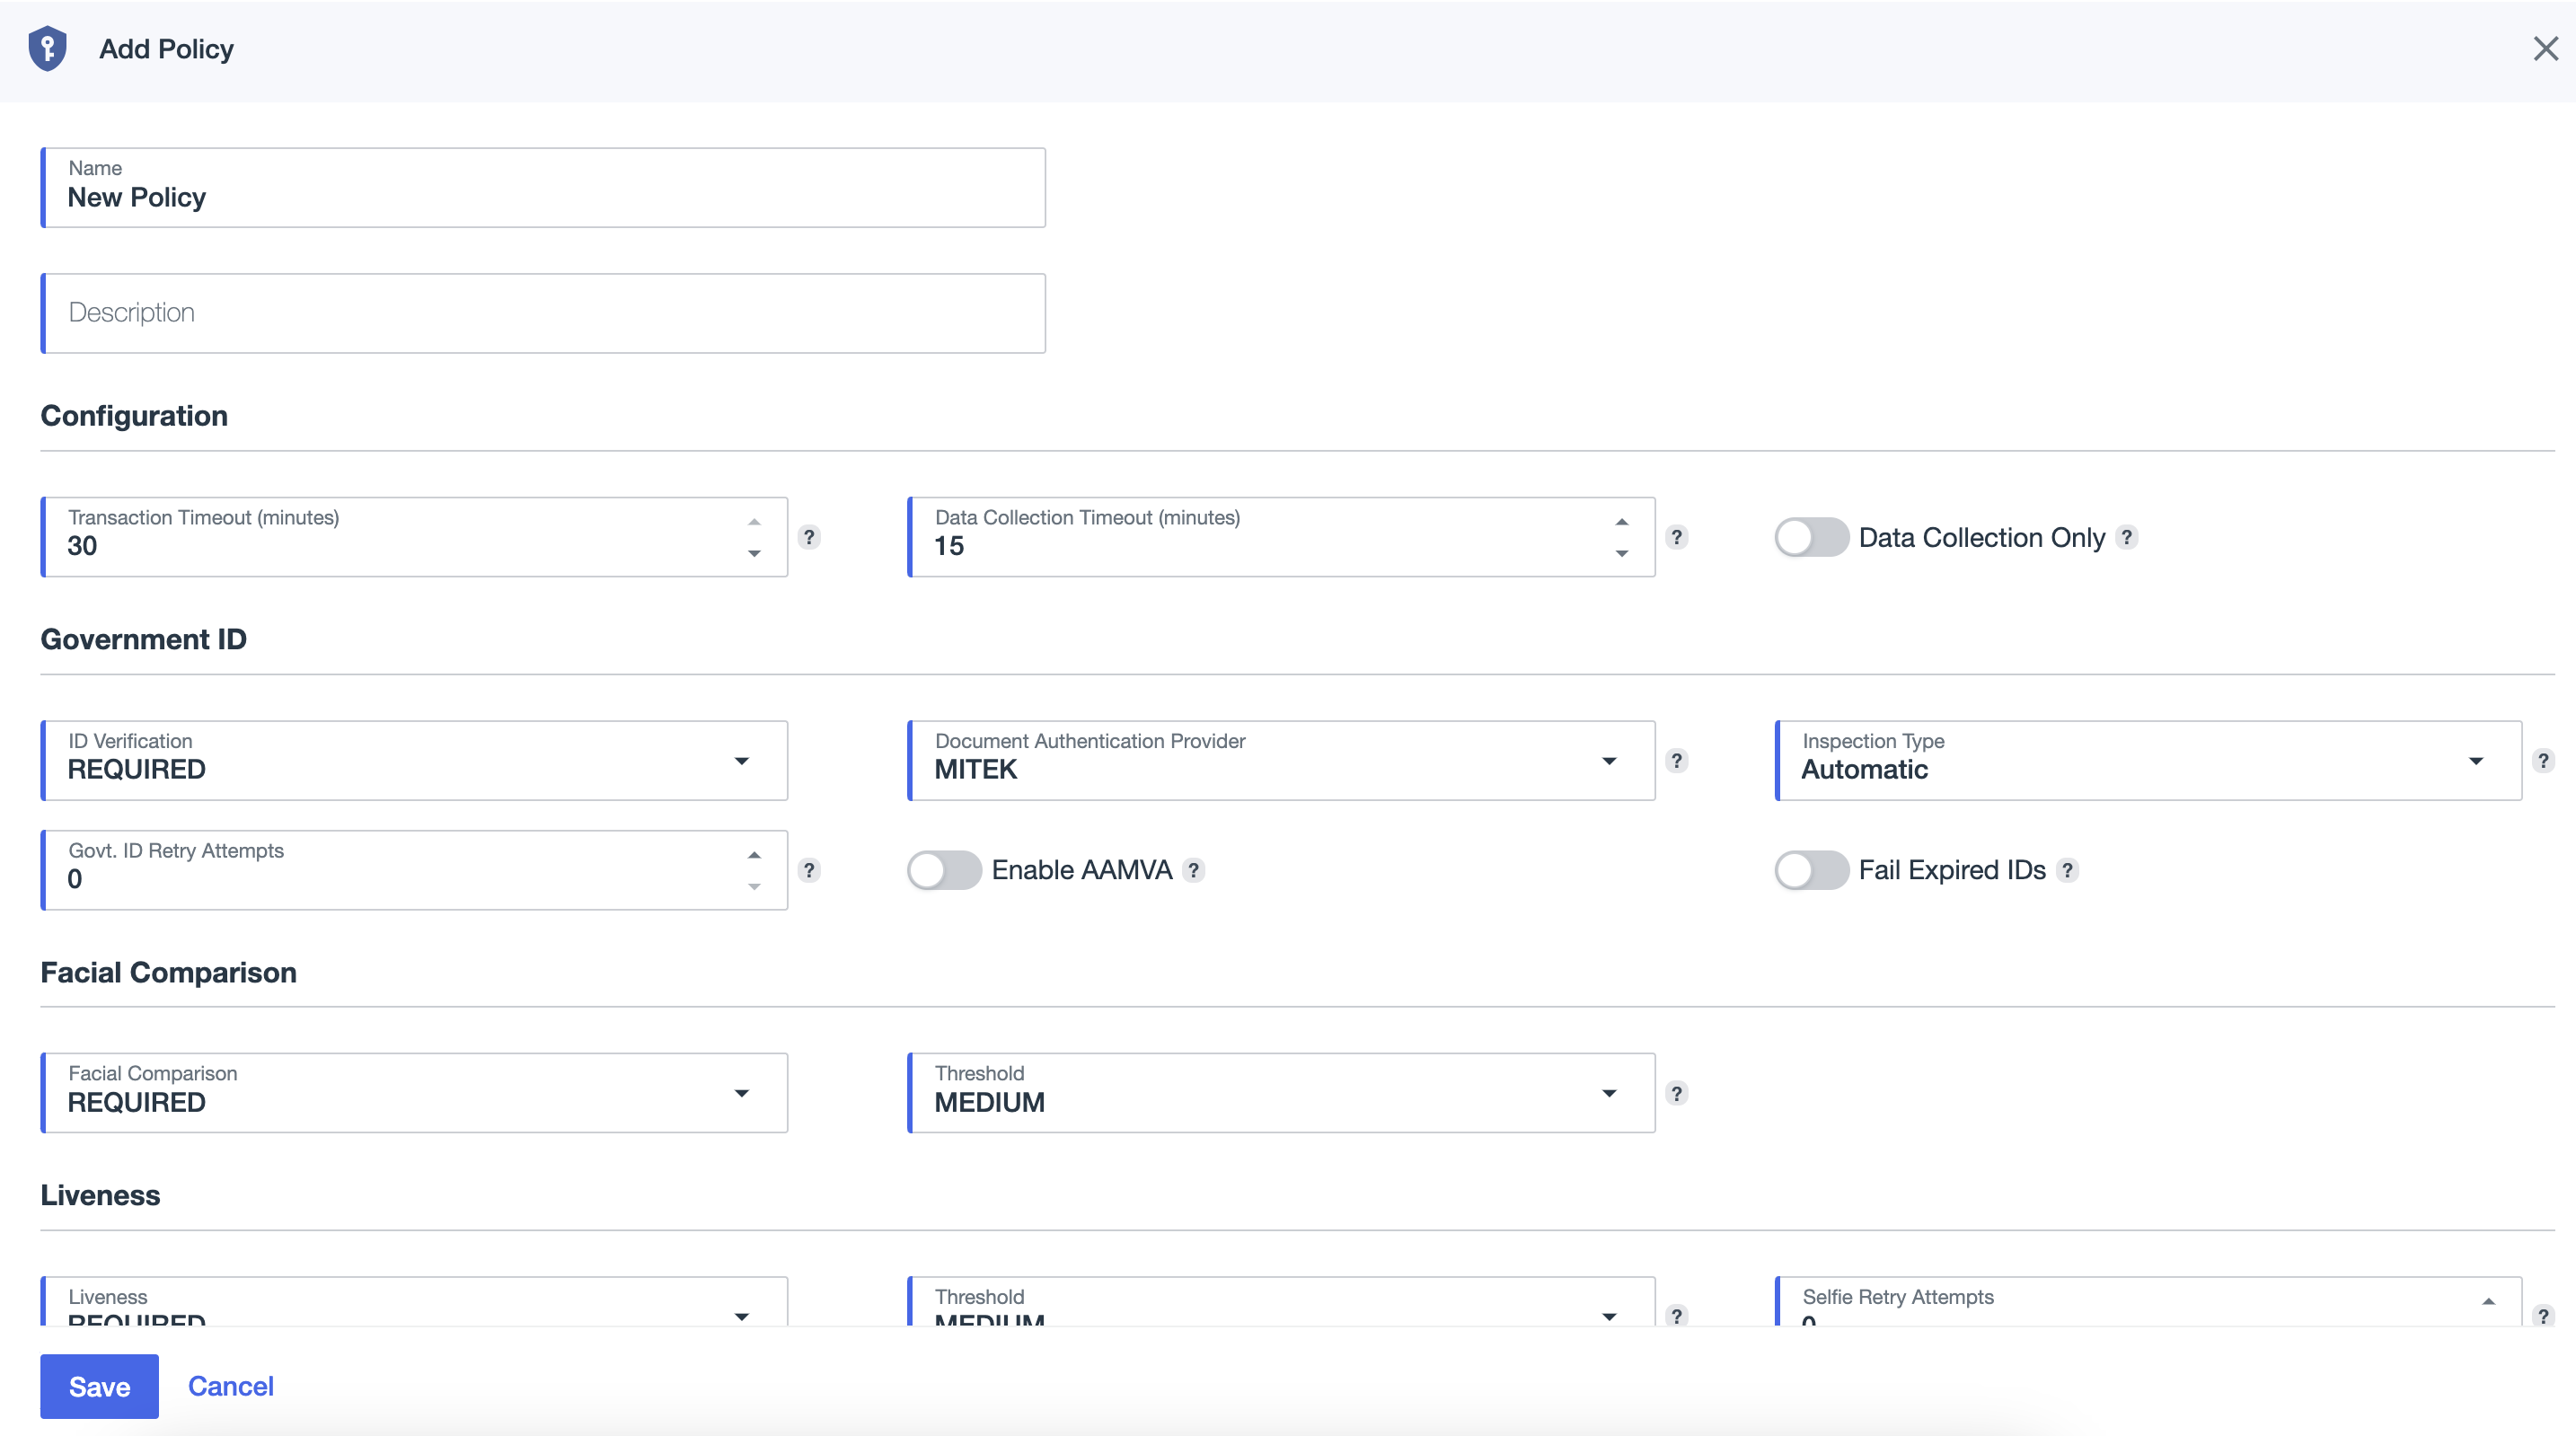
Example:
An example configuration on the Add Policy page.
-
-
Click Save.
Result:
Your new policy is shown on the Verify policies page.