Configure a Connection
About this task
Use the following procedure to configure a quick connection for single sign-on (SSO) to Heroku.
|
This procedure provides instructions for configuring minimum required connection settings. The instructions skip pages in which all necessary information is configured or defaults are used. You can add or change settings to suit your requirements. |
Steps
-
If you have not already done so, use PingFederate to configure the identity provider (IdP) adapter you want to use.
Learn more in Managing IdP adapters in the PingFederate documentation.
-
On the Main Menu, select Create New under SP Connections in the IdP Configuration section.
-
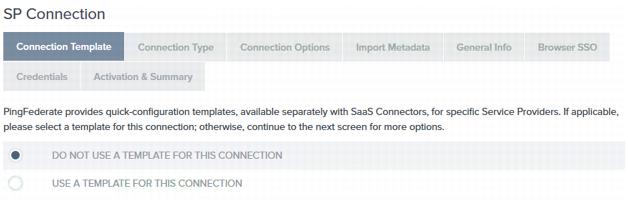
On the Connection Template page, select the Do not use a template for this connection and click Next.
-
On the Connection Type page, ensure that the Browser SSO profile is selected and click Next.
-
On the Connection Options page, ensure Browser SSO is selected and click Next.
-
On the Import Metadata page, click Choose file and select the Heroku
saml-metadata.xmlfile you created in Obtain the Heroku SAML 2.0 Metadata XML.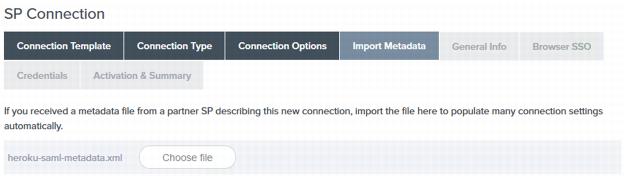
-
On the Metadata Summary page, click Next.
-
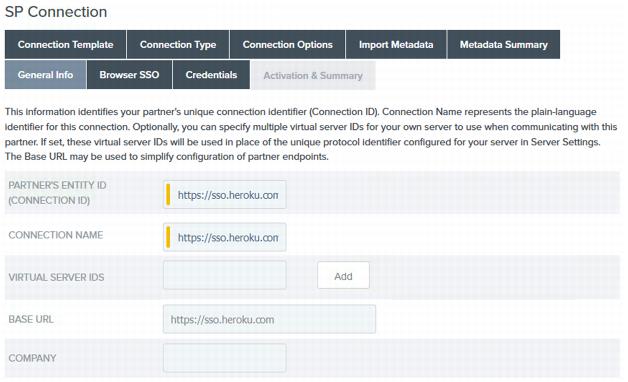
On the General Info page, ensure that the Partner’s Entity ID (Connection ID), Connection Name, and Base URL are accurate. Change details if required and click Next.
-
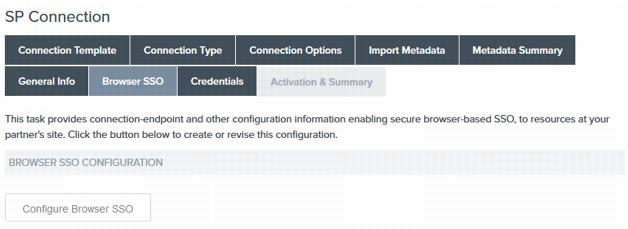
On the Browser SSO page, click Configure Browser SSO.
-
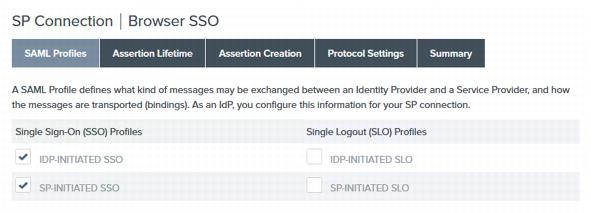
On the SAML Profiles page, ensure that the IdP-Initiated SSO and SP-Initiated SSO profiles are selected and click Next.
-
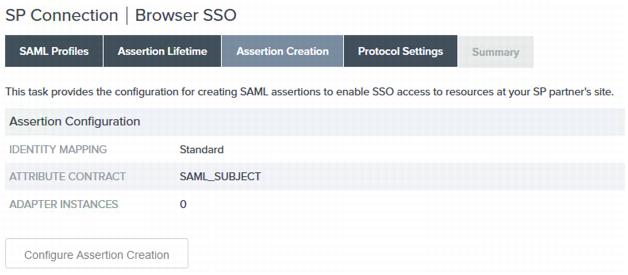
On the Assertion Creation page, click Configure Assertion Creation.
-
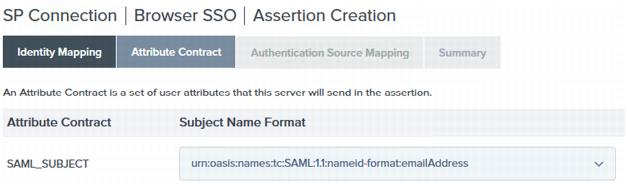
On the Attribute Contract page, ensure that the SAML_SUBJECT name format is set to:
following:urn:oasis:names:tc:SAML:1.1:nameid-format:emailAddress
-
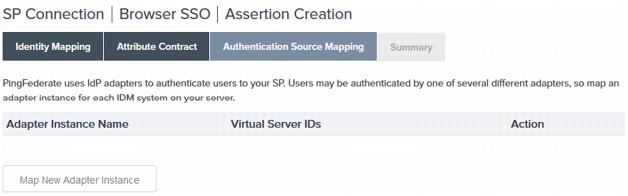
On the Authentication Source Mapping page, click Map New Adapter Instance and map the IdP Adapter Instance you defined earlier in this procedure. When you return to the Authentication Source Mapping page, click Done.
This configuration is site-dependent and cannot be pre-configured. You can find detailed information and instructions in Managing authentication source mappings in the PingFederate documentation.
-
When you return to the Assertion Creation page, click Next
-
On the Protocol Settings page, click Configure Protocol Settings.
-
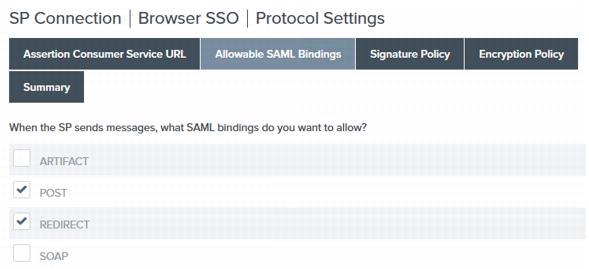
On the Allowable SAML Bindings page, ensure that only the POST and Redirect profiles are selected and click Next.
-
On the next page, ensure that the Always sign the SAML Assertion is selected and click Next.
-
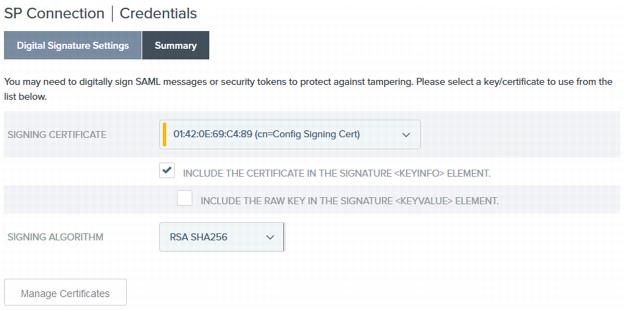
On the Browser SSO page, click Next and on the Credentials page, click Configure Credentials.
Learn more in Configuring digital signatures for service provider connections in the PingFederate documentation.
-
If you have not yet created or imported a signing certificate, click Manage Certificates and do so now. Learn more in Managing digital signing certificates and decryption keys in the PingFederate documentation.
-
Click Next.
-
On the Summary page, click Done.
-
On the Credentials page, click Next.
-
On the Activation & Summary page, Activate the SP Connection.
-
On the Activation & Summary page, click Save.