Step 3. Test the app
In the following procedure, you run the sample app that you configured in the previous step. The app performs a centralized login on your PingOne instance.
Log in as a demo user
-
In Xcode, select .
Xcode launches the sample app in the iPhone simulator.
-
In the sample app on the iPhone simulator, in the Select an action menu, select Login with Browser, and then click Perform Action.
 Figure 1. Select the PingOne environment
You might see a dialog asking if you want to open a browser. If you do, tap Continue. The app launches a web browser and redirects to your PingOne environment:
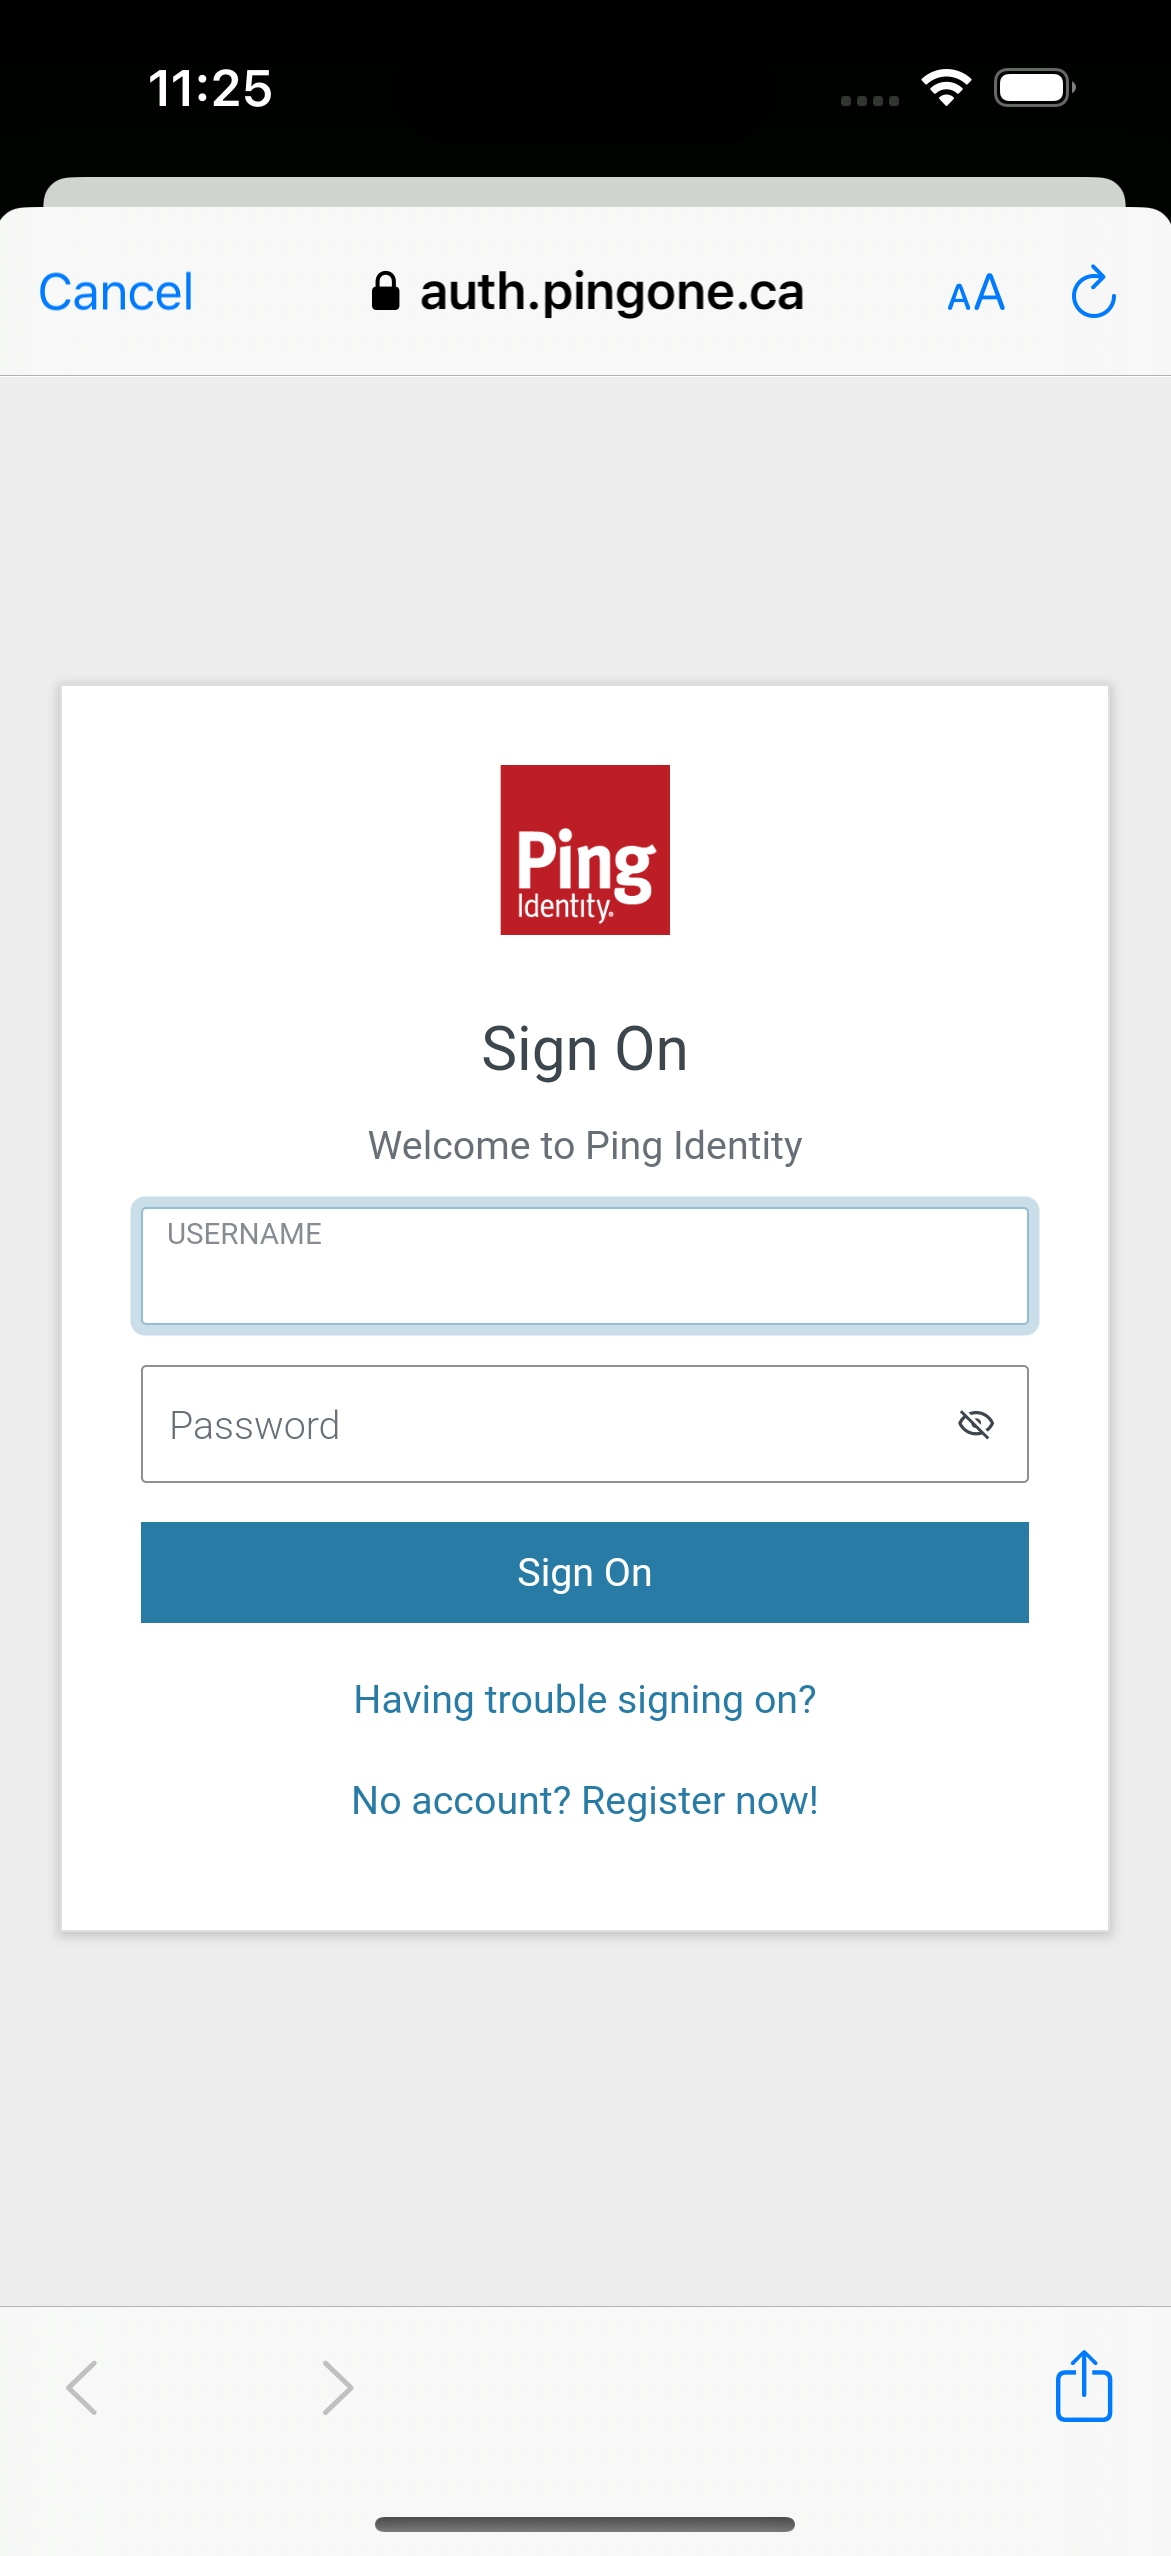 Figure 2. Browser launched and redirected to PingOne
 -
Sign on as a demo user:
-
Name:
demo -
Password:
Ch4ng3it!
If authentication is successful, the application displays the tokens issued by PingOne.
-
-
Tap Login with Browser to open the drop-down menu, select User Logout, and then tap Perform Action.
The app briefly opens a browser to sign the user out of PingOne, and revoke the tokens.
To verify the user is signed out:
-
In the PingOne administration console, navigate to Directory > Users.
-
Select the user you signed in as.
-
From the Sevices dropdown, select Authentication:
 Figure 3. Checking a user’s sessions in PingOne.
The Sessions section displays any existing sessions the user has, and whether they originate from a mobile device.
-